
Get Windows 7 Start Menu in Windows 8 Developer Preview

 I think you’ve familiar with Windows 8 installation, in Windows 8 Microsoft placed new metro style start for accessing the desktop and other utils. you can download Windows 8 from official website. But i still like to work on classic windows 7 start menu because it has very good features including search and accessing the app are very easy. If u wish to go back to the Windows 7 start menu on Windows 8, here is a small how to guide.


Editing the registry is risky one, It is recommended to backup the registry before editing. Please do not make any editing unless you are confident on what you are doing.
  1. Go to Run (Press Win+R)
  2. Type regedit and Press OK.
  3. go to HKEY_CURRENT_USER\Software\Microsoft\Windows\CurrentVersion\Explorer
  4. Right Click on RPEnabled
  5. Change the Value from 1 to Zero
  6. Click OK
Changes will effect immediately, Just press Windows Start button now you will get a classic Windows 7 Start menu with Windows 8 Start Button.
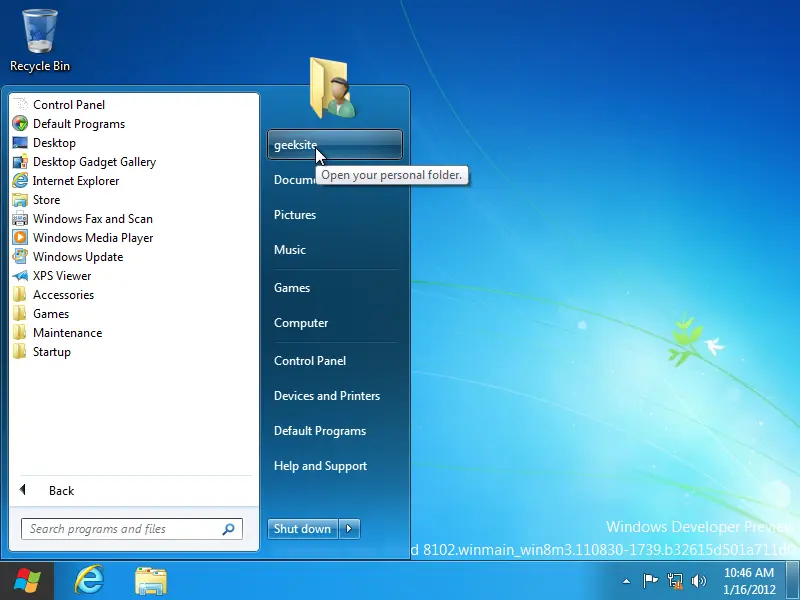
Now logout and login again, your Start button logo also changed to Windows 7 logo.
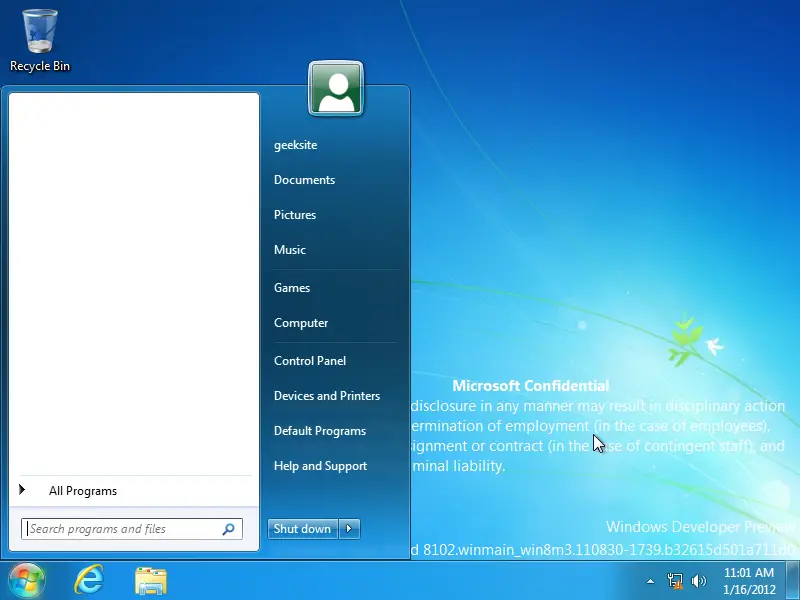
Disclaimer: Windows 7 classic desktop comes with warning too. it is sating that ” Unauthorized use or disclosure in any manner may result in disciplinary action up to and including termination of employment)in case of employees). termination of an assignment or contract (in case of contingent staff) and potential civil and criminal liability. This is for information purpose not for any other, do it on own risk.


Comments

Popular posts from this blog

Fix error 0xc000007b “The Application Was Unable To Start Correctly”

Fix error 0xc000007b “The Application Was Unable To Start Correctly” Windows is one of the most popular OS ( Operating System ) used today by several users. There are lot of versions available for the Windows. The most popular version of the window is Window 7.0. Some user switches to the newest version but still there are lot of people who is using the older version. There is one of the most common error  “The application was unable to start correctly 0xc00007b”  is faced by the all windows user. Today we are going to show you how to solve this error.  Before we get to the solutions of this error let’s take a look at the reason behind this error. There could be any reason of this error but we listed some of the most common reason for this error. The 32-bit app tries to execute on a 64-bit system. You might be trying to play a Game on your PC and after launching the application, error code  0xc00007b  may flash on your screen. You might be...
How to find and remove duplicate files from PC uplicate files can cause all kinds of problems on your computer, taking up precious storage room, confusing your photo or media manager apps, and generally getting in the way of searches and other operations when you'd rather they didn't. You don't have to accept duplicate files as an inevitability of running a PC, though: Here's how to get rid of them. Duplicate files can crop up for all kinds of reasons: Maybe you downloaded a file, forgot it was there, and then downloaded it again; maybe you copied a folder of images and then never got around to getting rid of the originals. Whatever the reason, they clog up your disk space and shouldn't be left to gather dust. For the purposes of this guide we're going to use DupeGuru-it's Lifehacker's pick as the best duplicate file finder for Windows, and it's available for Mac and Linux as well. If you're not taken with DupeGuru, then some of the best al...

Gmail Automation

Gmail Automation: 5 Useful Google Scripts to Automate Your Gmail 1. Auto delete emails after X number of days Very often, after we read the email, we will just keep it in our inbox, regardless whether it is useful or not. While Google gives you tons of space to store your emails, you might still want to clean up your inbox and get rid of those useless emails. The following script can check emails with the “Delete Me” label and delete them after “x” number of days. 1. Go to  Google Scripts  and create a blank project (make sure you are logged into your Google account). Paste the following script and save it. function auto_delete_mails ( ) { var label = GmailApp.getUserLabelByName ( "Delete Me" ) ; if ( label == null ) { GmailApp.createLabel ( 'Delete Me' ) ; } else { var delayDays = 2 // Enter # of days before messages are moved to trash var maxDate = new Date ( ) ; maxDate.setDate ( maxDate.getDate ( ) -delay...